Thursday, March 31, 2011

My First Quilled Butterfly

This is my first project in my quilling adventure. I should say first completed project. I started off with a peacock and could not finish it because I ran out of the quilling strips and never completed it after that. When I started making this butterfly, I was so obsessed with quilling, that I completed this in a couple of hours. I liked the outcome. But it definitely needs more perfection. Hope that will come with practice. But I guess I did a ok job for a first timer :-) .

If framed, this will make very good wall hangings.


Wednesday, March 30, 2011

Tomato Dosa

This is a very quick dosa recipe that requires very little prep work. Tomato dosa does not need to be fermented. The dosa gets the tangy and sour taste from the tomatoes.

This recipe comes in handy whenever I do not have dosa batter in the fridge but still crave for dosas with coconut chutney. Coconut chutney is the best combination for this dosa.


Ingredients:

1. Idli rice - 1 cup
2. Tomatoes - 2 medium
3. Grated coconut - 2 tablespoons
4. Red Chilli - 1 /per taste
5. Salt - to taste
6. Oil - to make dosas

Method:

1. Soak the idli rice for 2-3 hours.
2. First grind tomatoes, coconut and red chilli into a fine paste, then add the soaked rice and grind it fine by adding enough water.
3. The consistency of the batter should be like the regular dosa batter.
4. Add salt and make dosas.This dosa takes a little longer to cook than the normal dosa.
5. Flip the dosa to let it cook on the other side to get nice crispy dosas.


Serve it with coconut chtney or any chutney of your choice.

Monday, March 28, 2011

Carrot Kheer

I am still using up the big bag of carrots :-)

I wanted to make a dessert that is not very time consuming. I have had carrot kheer only once when I was in college. My friend's aunt made it and I really liked it. But never had a chance to try it again. I knew that it doesnt take a long time to make this kheer. So tried it and believe me, it tastes very good. There are not many ingerdients needed to make this kheer. Heavy cream is really optional. I could not resist myself adding heavy cream to this kheer, so just added a teaspoon of cream. But, even without heavy cream, you will get the same taste.


Ingredients:

1. Carrots - 4 medium sized
2. Milk - 3 to 4 cups
3. Cardamom powder- 1 teaspoon
4. Sugar - 5 teaspoons / per taste
5. Saffron - few strands
6. Heavy cream - 1 teaspoon (optional)
7. Cashews - 6 (to garnish)
8. Ghee - 2 tablespoons

Method:

1. Pressure cook the carrots till they become soft and blend it into a smooth paste and keep aside.
2. Break cashews into small pieces and fry it in the ghee till golden brown and keep it aside.
3. In the same pan with the ghee, add the pureed carrots and saute it till the raw smell goes away.
4. Add sugar, milk and cream and keep stirring till the mixture thickens up.
5. Once it reaches your desired consistency, add the fried cashews and serve it warm or cold with a garnish of saffron strands.

Friday, March 25, 2011

Pottery Painting and I

I was walking on the streets of Chennai one day and found little clay pots sitting in a road side shop. Those were the days when I was doing some mirror work in my salwars. I asked myself, how would mirror work on these little pots look like? And this is the result of my imagination :-) .

They make very nice show pieces. I started painting the clay pots with black paint. Let it dry overnight and the next day, did some artwork with silver paint and mirrors. Its a bangle that is in between the middle pot and the last pot. I bought that bangle in a craft store and never really used it. When I combined the bangle with the finished pottery work, they looked great and so I don't regret that I bought the bangle.


After coming to the US, I searched for clay pots like this with no success. All I could find was the tiny flower pots. But didnt like the look of it for my kind of painting. I joined a pottery painting class with Clay Dreams in Arlington, MA. I did a couple of projects there with them using ceramic vases. But then couldn't continue due to my schedule.


Its been years since I indulged myself in pottery painting. My interest in pottery painting just passed by like a breeze. Hope that breeze comes back again :-) .

Thursday, March 24, 2011

Instant Dosa

I wanted to make something very quick for dinner today before my little one comes back from the daycare.


I came across this recipe once in Padhus kitchen . She had mentioned that this instant dosa will just take 2 minutes. So I thought, I will give it a try and the dosas came out really goodl. Nice alternative to the normal wheat dosa.


This recipe will yield 15 dosas approximately.


Ingredients:


1. Wheat flour - 1 cup
2. Rice flour - 1 cup
3. Salt - as needed
4. Water - 4 1/2 cups


To temper:


1. Oil - 1 teaspoon
2. Cumin seeds- 1 teaspoon
3. Green chillies - 2 finely chopped
4. Hing - a generous pinch


Method:


1. Mix everything together mentioned in the ingredients section. make sure there are no lumps. The batter should be watery.
2. In a pan heat the oil and add cumin, green chillies and hing. Add this to the dosa batter.
3. Now make dosas. You will not be able to spread the batter in the dosa tawa like you would normally do. Take a spoon full of batter and make circle from the outer edge and the batter will naturally flow inside. If needed you can fill in using additional batter.
4. Spray little oil. This dosa takes a little longer to cook than the normal dosa. Flip it over once one side is cooked. Let the other side of the dosa cook.
5. Serve it hot with coconut chutney.

Wednesday, March 23, 2011

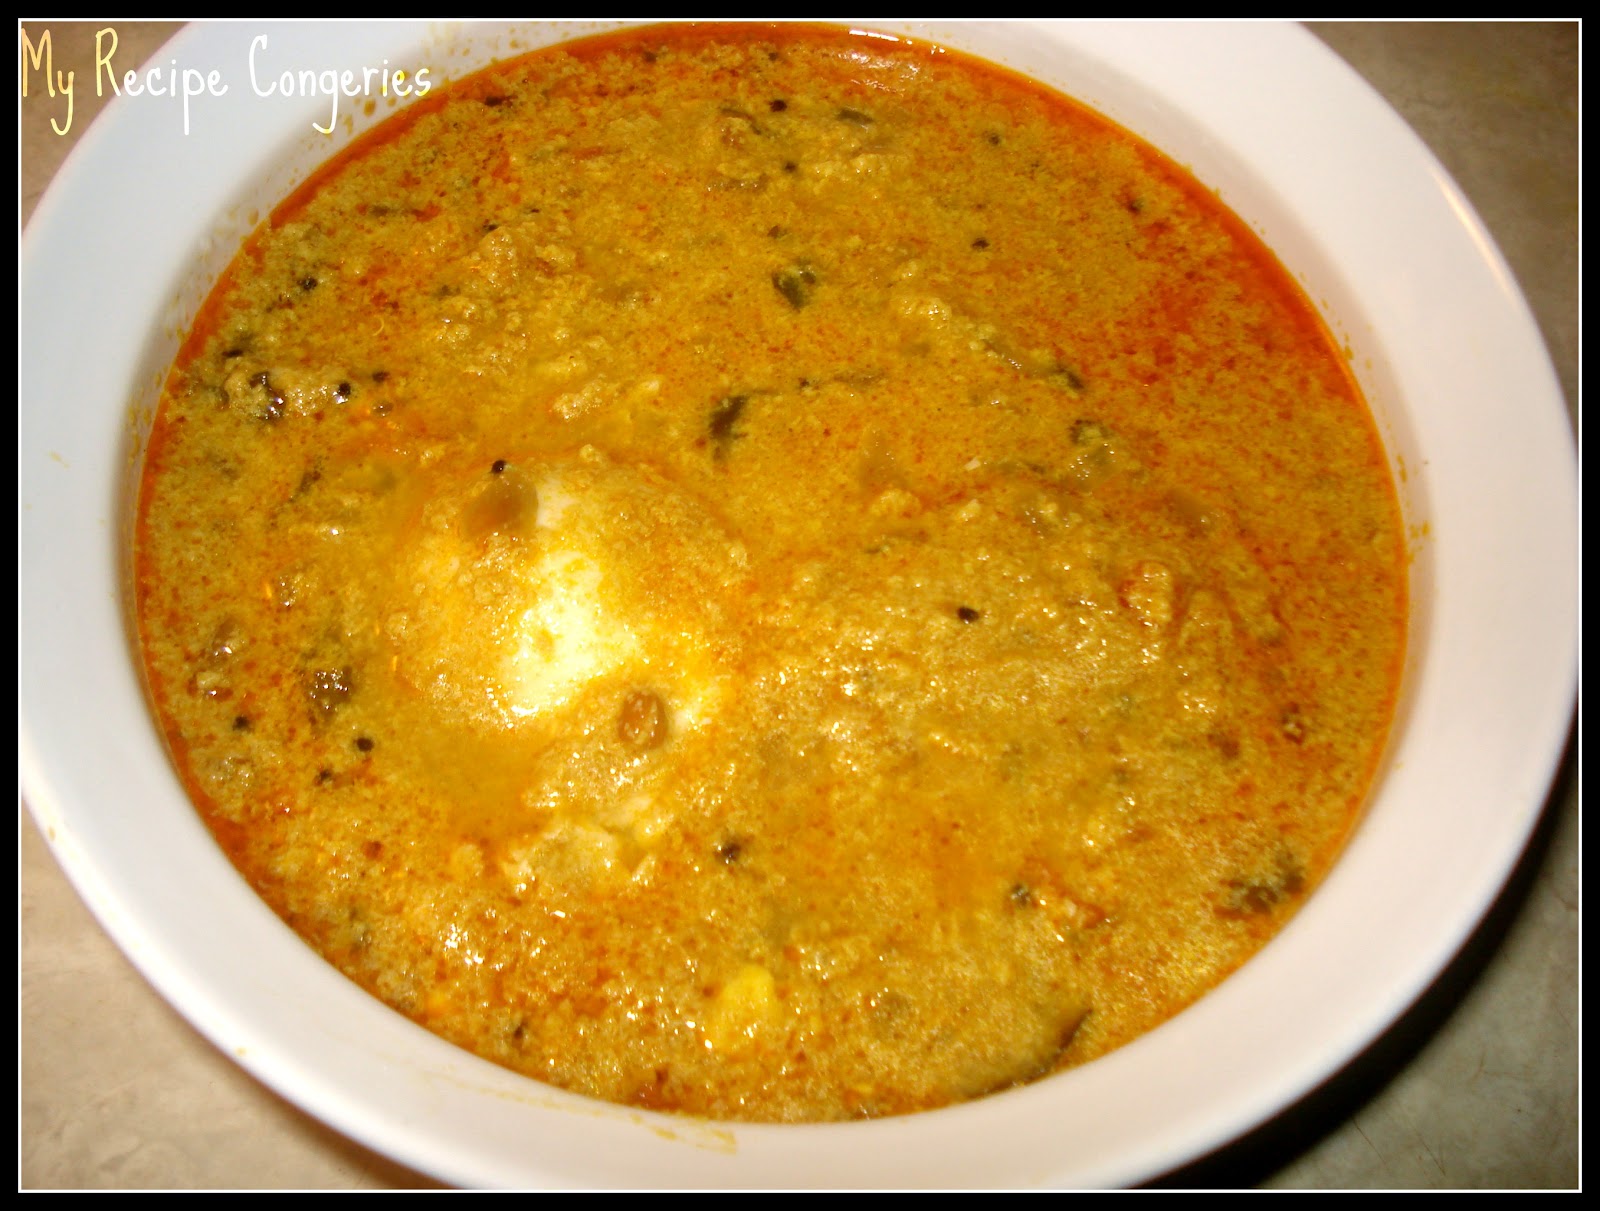
Egg Kuruma

As promised, here comes the egg kuruma recipe.


The basic sauce in this recipe is my mom's and the way I add the last 2 eggs is from my mother-in-law. My mom adds hard boiled eggs and I am not a big fan of gundu muttai(That is how I call hard boiled eggs :-) ). Once, I told my mother-in-law that I am making egg kuruma. She asked me to just break the eggs in the sauce, that way the eggs will get cooked in the sauce. I liked that idea. The eggs tasted good with the taste of the sauce in it and no more gundu muttai in the kuruma from that day :-)


It is very versatile. You can have it with white rice or malabar parotta or puris or rotis.


Ingredients:

1. Onion - 1 medium (chopped)
2. Tomatoes - 1 medium (chopped)
3. Ginger garlic paste - 1 teaspoon
4. Chilli powder - 1 table spoon
5. Garam masala powder - 1 teaspoon
6. Grated coconut - 1 1/2 table spoons
7. Poppy seeds - 2 teaspoons
8. Eggs - 3
9. Salt - as needed
10. Oil - 2 teaspoons
11. Mustard seeds - 1 teaspoon
12. Uradh dhal - 1 teaspoon
13. Curry leaves - few

Method:

1. Grind coconut and poppy seeds into a very fine paste with little bit of water and keep it aside.
2. Use a hand mixer to beat one egg and keep it aside.
3. In a kadai, heat the oil. Add mustard seeds, uradh dhal, add the curry leaves after the mustard seeds splutter.
4. Add the ginger garlic paste and saute till the raw smell goes away.
5. Add the chopped onions and saute till they turn translucent.
6. Now add the chopped tomatoes and salt. Let it cook till oil seperates.
7. Add chilli powder and garam masala powder and stir for a few minutes.
8. Add the ground mixture to the sauted masala. Add little water and let it come to a boil.
9. Once, the sauce comes to a boil, slowly add the beaten egg and stir continuosly. The sauce will get a different consistency now and it gets thicker. Add water if needed. Cover and let it cook for 5 minutes.
10. This is the basic sauce that my mom makes. After this, you can either add hard boiled eggs or break the eggs into the sauce as I do.
11. Reduce the heat, break one egg at a time(In different places) into the sauce slowly. The sauce should not be boiling. Otherwise the eggs will scramble. Do not mix till the eggs get completely cooked. Increase the heat. The eggs will be cooked in a couple of minutes.

Egg kuruma is ready to serve with rice/roti/parotta/puri.

Monday, March 21, 2011

Pav Bhaji

My first introduction to chaat was only during my college days.There was a chaat shop near the place where me and my friends stayed. I was a regular customer of that shop for their pav bhaji. But I always ate that with a guilt, thinking the bhaji is full of potatoes and nothing else.
When I came to the US, my neighbor was from Gujarat and she was an expert in making all chaat items. She prepared pav bhaji for me once and I asked her how to make it. From then on, this chat is in our dinner menu almost every week. We enjoy it every time but without a guilt knowing that it has a lot of other vegetables making the dish very nutritious. A very good way to sneak in all the vegetables to your kids :-)


Ingredients:


1. Carrots- roughly chopped 3 medium
2. Beans - roughly chopped - few
3. Cauliflower- roughly chopped 1/2 flower
4. Cabbage -  1/4 of a small cabbage roughly chopped
5. Potatoes - 2 medium
6. Frozen peas - 1 cup
7. Capsicum -1 finely chopped
8. Onion - 2 medium cubed
9. Tomatoes - 2 large
10. Cilantro- to garnish
11. Pav bun - 1 pack of 6 buns
12. Butter - to toast the buns.
13. Oil - 2 tablespoons
14. Store bought Pav Bhaji Masala - 3 tablespoons/ per taste (I use MDH brand from Indian stores)
15. Salt - to taste
16. Lemon- 1
Method:


1. Pressure cook all the ingredients from 1 through 5 till they become soft and mushy. mash it well with a spoon.Add water if needed and keep it aside.
2. In a mixer, grind the cubed onions coarsely and keep it aside.
3. Same way, grind the tomatoes and keep it aside.
4. In a wide pan heat some oil. You can also add butter. I sometimes add 1 tablespoon of butter and 1 tablespoon of oil.
5. Add the ground onion and saute till the raw smell goes away.
6. Then add the ground tomatoes and saute it for sometime.
7. Then add finely chopped capsicum. You need not saute it fully. It has to be crisp. Then add the pav bhaji masala and saute well till it mixes with all the sauted ingredients.
8.Now, add the boiled and mashed vegetables, mix it well with the masala and cook it till it becomes thick. You can add the peas at this stage and cook for sometime.Bhaji is now ready.
9. Toast the pav with butter and serve it with bhaji with chopped onions, cilantro and a piece of lemon.


This bhaji will also go in our tomorrow's lunch box in between two whole wheat breads as a vegetable sandwich.What a healthy lunch :-).